
Specialist LCD/OLED Supplier
|
|






arduino display panel
What Does “Arduino Display Panel” Mean?
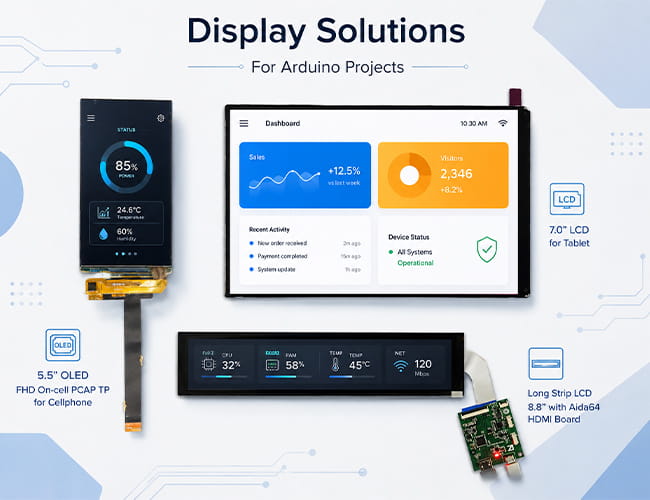
An Arduino display panel is a screen module or display solution used with Arduino-based development boards, microcontrollers, and embedded prototype systems. It can be a small OLED for simple data output, a TFT-LCD for graphical interfaces, or a larger display panel driven through a controller board.
For many Arduino projects, the display is the most direct part of the user experience. It turns sensor readings, system status, menus, images, and control data into a visible interface. The right display choice depends on screen size, resolution, interface type, power design, touch requirements, and the way the final product will be used.
-
Size(inch)
- 0.39~1.0
- 1.0~1.9
- 2.0~2.9
- 3.0~3.9
- 4.0~4.9
- 5.0~5.9
- 6.0~6.9
- 7.0~7.9
- 8.0~9.9
- 10~20
-
Interface
- I2C
- SPI
- Parallal
- MCU
- CPU
- RGB
- MIPI
- LVDS
- eDP
- HDMI
-
Display Color
- Monochrome
- Double Color
- Full Color
-
Orientation
- Landscape
- Portrait
| Model | Size | Display Type | Resolution | Interface | Display Brand | Image | ||||||||||
|---|---|---|---|---|---|---|---|---|---|---|---|---|---|---|---|---|

5.5 inch OLED FHD On-cell PACP TP For Cellphone
|
5.5 | AMOLED | 1080(RGB)×1920 | MIPI | AUO |
|
||||||||||

7.0 inch LCD For Tablet
|
7.0 | TFT-LCD | 1200(RGB)×1920 , WUXGA | MIPI | JDI |
|
||||||||||
8.8 inch Long Strip LCD Aida64 HDMI Board
|
8.8 | TFT-LCD | 1920×480(RGB) 222PPI | MIPI | HannStar |
|
How Arduino Works with Display Panels
Arduino boards can communicate with display modules through common interfaces such as I2C, SPI, MCU parallel, RGB, or serial control methods. Small OLED and TFT modules are often used directly in simple projects because they are easy to wire and suitable for basic graphics, icons, and real-time data.
For high-resolution LCD, AMOLED, MIPI, LVDS, eDP, or HDMI display panels, Arduino is usually part of a larger display system. In this case, Arduino may handle sensors, buttons, control logic, or serial commands, while a display driver board or controller board manages the screen signal and image output.
Common Display Types for Arduino Projects
Arduino-related display projects can use different screen technologies depending on the application. OLED displays are suitable for compact control panels, wearable prototypes, and low-power status screens. TFT-LCD panels are widely used for colorful user interfaces, handheld devices, tablet-style screens, and industrial control systems.
Long strip LCDs are useful for narrow dashboard spaces, PC monitoring panels, equipment status bars, and custom embedded interfaces. For advanced prototypes, AMOLED and high-resolution LCD panels can help create a more polished product experience when used with the right interface board or controller solution.
Choosing the Right Arduino Display Interface
The interface determines how easily a display can be connected, driven, and integrated into a project. I2C is simple and uses fewer pins, making it suitable for small status screens. SPI provides faster data transfer and is commonly used with color TFT and OLED modules.
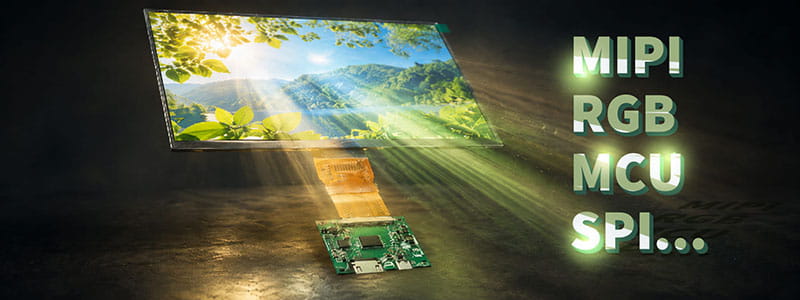
Parallel MCU and RGB interfaces are better for larger displays that need more bandwidth. MIPI, LVDS, eDP, and HDMI are commonly used in high-resolution panels, usually with a bridge board or display controller. Choosing the right interface early can reduce development time and avoid compatibility problems later.
Typical Applications of Arduino Display Panels
Arduino display panels are widely used in sensor dashboards, smart home controllers, handheld instruments, industrial monitoring devices, medical electronics, educational kits, robot interfaces, battery testers, IoT terminals, and maker projects.
A small OLED may be enough for temperature, voltage, or status information. A 7.0 inch LCD can support a richer interface for tablet-style control systems. An 8.8 inch long strip LCD can show continuous monitoring data, system status, or compact dashboard information in limited installation spaces.
Arduino Display Solutions from Panox Display
Panox Display provides OLED, AMOLED, TFT-LCD, long strip LCD, touch panel, and controller board solutions for embedded display projects. The Arduino display panel selection can support different development needs, from compact control screens to larger high-resolution interface displays.
For projects that need more than a basic plug-in module, Panox Display can help with display panels, touch integration, interface adaptation, connectors, FPC structure, and HDMI/MIPI/LVDS/eDP controller board solutions.
More About Arduino Display Panels
What Is an Arduino Display? A Practical Guide to Display Panels, Interfaces and Project Selection
What Are the Key Differences Between Arduino and Raspberry Pi?
Customized Service
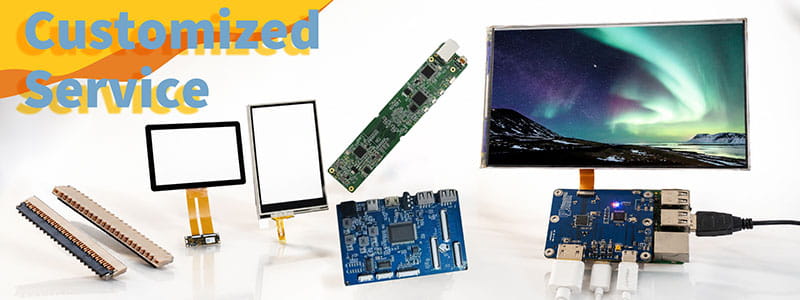
It`s just a beginning to get display panels from us, then clients need to solve cover glass/touch panel, driving board, connectors on PCB.Fortunately Panox Display provide complete display solutions.
Connectors
Panox Display provides free connectors for clients who purchase more than five products from us. Our product range includes connectors from Molex, Kyocera, AXE, AXG, JAE, Hiros, and more.
Cover Glass/Touch Panels
Panox Display provides a customized cover glass/touch panel service. We supply cover glass from Gorilla, AGC, and Panda, which all have excellent optical performance. We also supply driver ICs from Goodix and Focaltech.
Controller/Driver Boards
If your applications are directly connected to a PC, a cellphone, or Raspberry Pi, and you have enough space to insert a board to input video, Panox Display can provide customized Controller/Driver boards with input connections for VGA, HDMI, DVI, DP, Type-C video input, MIPI, RGB, LVDS, and eDP.
The functions of our boards include, but are not limited to, adjustment of brightness, sound output, touch interface, extra data transmission, and gyroscope.
Simple Instructions
#MIPI# How to Bring Up a MIPI DSI Display: A Practical Guide for Embedded Display Integration.
#MIPI# D-PHY and C-PHY Physical Layer Guide for Display Interfaces.
#MIPI#DSI PCB Layout Guidelines for Reliable Display Interfaces
#SPI#MCU# LCD MCU Interface and SPI Interface Explained: 8080 Parallel vs Serial LCD Connections.
#MIPI# DSI PCB Layout Guidelines for Reliable Display Interfaces
#MIPI# vs #LVDS# Display Interface Differences and Selection Guide
#MIPI DSI# Interface Guide: Protocol, D-PHY, Linux Driver Bring-Up, and Debugging
#POS LCD#How to Build Main and Secondary Display Output for POS Terminals
If our display fit your application, subscrlbe for monthly Insights
Panox Display Professional OLED/LCD Supplier and Manufacturer
- 📍 Shenzhen
- 📞 Phone: 86 755 3396 6409
- 📠 Skype: panoxwesley

If it`s urgent, try to contact
Whatsapp: +86 18665870665
Skype: panoxwesley
QQ: 407417798