


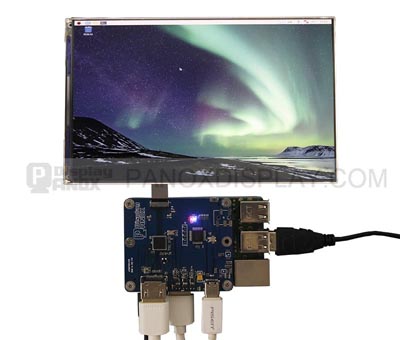
Raspberry Pi is a small computer that can be used for a variety of projects. It is a popular choice for hobbyists and professionals alike due to its versatility, affordability, and ease of use. One of the most popular uses for the Raspberry Pi is as a control system for LCD displays.
How To Drive LCD with Raspberry Pi?
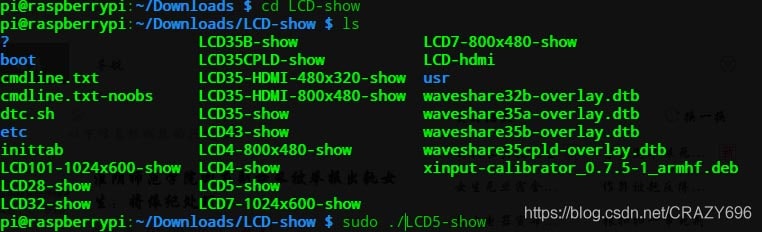
First, you need a HDMI controller board for the LCD, fortunately, Panox Display can provide HDMI controller board for most of our LCD/OLED display panel.Download the LCD driver of Raspberry Pi. Copy the rar file to Raspberry Pi, and uncompress, then enter the file “LCD-Raspberry” folder, run the program in file folder, and run the command sudo ./LCD7-show (choose the commend according to the size of your display).
Download LCD-Raspberry Driver File
Raspberry Pi will restart automatically.
Related: LCD/OLED with Available HDMI Controller Board
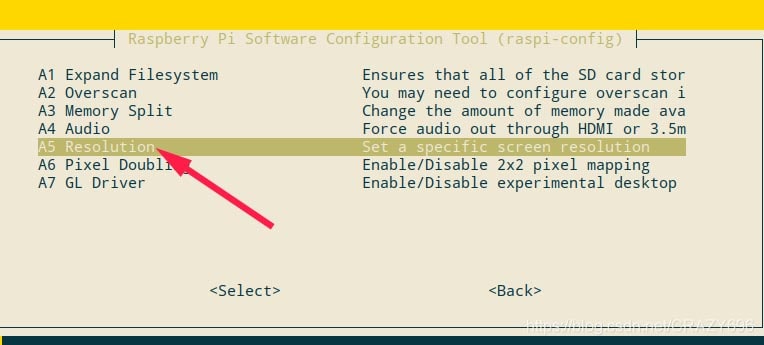
How To Set Right Resolution on Raspberry Pi ?
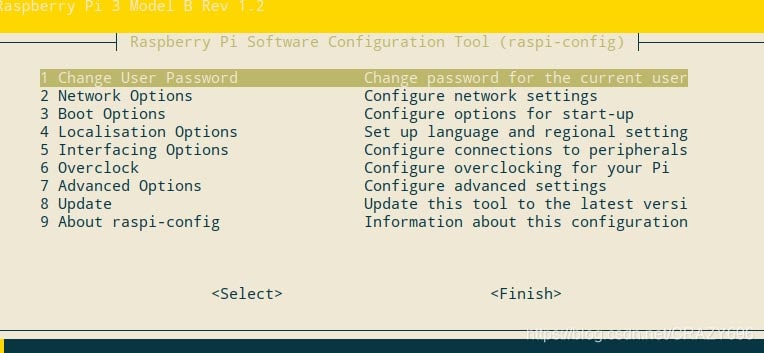
Input command “sudo raspi-config” to enter following HMI.
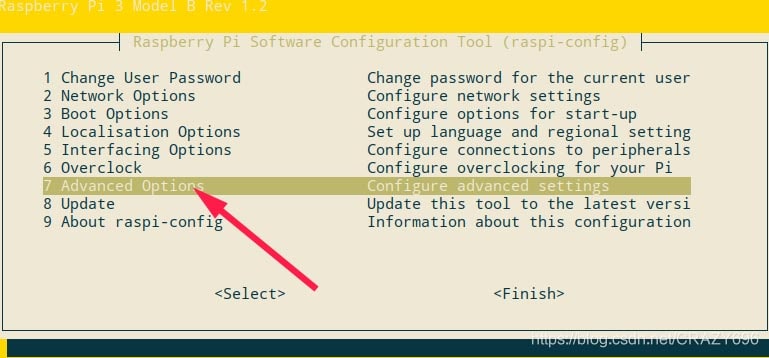
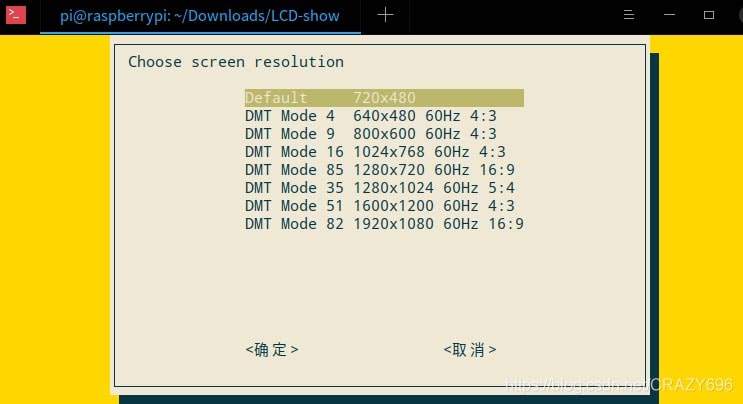
Choose the right resolution and restart Raspberry Pi.
Calibrate Touch Panel of Raspberry Pi
1. Use downloaded System
Run the following command,
su pi
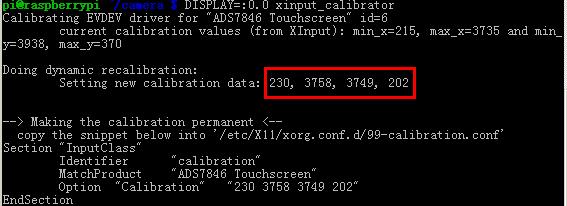
DISPLAY=:0.0 xinput_calibrator
And get 4 calibration parameters
Run following command
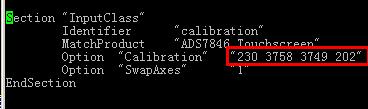
sudo nano /etc/X11/xorg.conf.d/99-calibration.conf
Open the file and use previous calibration parameters to replace four parameters in red frame.
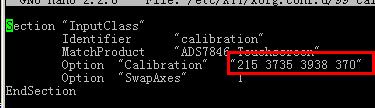
Change to following numbers,
Press Ctrl+X, and Y to save and quit.
Run
sudo reboot
Restart and touch panel will work well.
2. Use Your Own System
Copy driver to your Raspberry Pi, and input following command,
Sudo dpkg -i -B xinput-calibrator_0.7.5-1_armhf.deb
After install calibration program, then repeat previous steps.


